*Squeal!*
I've been doing a lot of that today. Why? Well, every five minutes or so, my lovely computer beeps and another sweet message pops up from a reader. In between the pop ups, I've been exploring the delicious talent hidden in the nooks of the crafty blogoshphere via the Sew, Mama, Sew! giveaway list. Have you seen some of the goodies up for grabs? IN-credible. Which reminds me- there's still time to enter my giveaway if you haven't already!
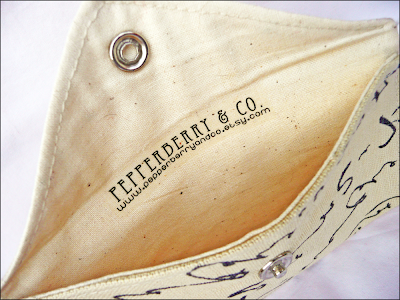
Now, onto the serious business: let's talk about Nipples and Donuts. The metal kind. The kind that can turn any little pouch into a serious wallet. This kind:
 After posting about the launch of my Snap Pouches, I received a few enquiries about how I put my metal snaps in. I'm here to serve, so here's your tutorial!
BEFORE YOU START
Grab a hammer, some scrap fabric and a pack of Metal Snaps from your local craft store. You'll want to practice the first few times in case things go wrong!
MEET THE TEAM
In every packet of snaps come four uniquely shaped pieces and a tool. The pieces are, from left to right, the Donut, the Inner Button, the Nipple, and the Outer Button. Take one of each pieces and the tool out so you're ready to go.

COME TO THE ENGAGEMENT PARTY
The Outer Button and the Donut are, in fact, engaged to be married.

OUT ON THE CONCRETE
These two belong together, so take them out of the pack and place the Outer Button on a hard surface. Yes, hard. Not an ironing board or a table. I'm talking a concrete porch with a single sheet laid down to protect your snap. Then get your fabric ready.

PIERCE WITH PRONGS
Take your tool and use the thin end to push the fabric over the prongs of the Outer Button.

THE JAGGED SEAL
The Donut has two different sides. If you look closely at the middle section of the Donut in the photo on the left, it has a sealed edge and a larger hole. The middle of the Donut in the photo on the right is far more jagged, as though it has little lines cut into it, and has a smaller hole.


GIVE THE DONUT A HOME
Place the Donut on the prongs of the Outer Button with the jagged side (small hole) facing towards you.

TOOL & HAMMER
Place the thick end of the tool flat onto the Donut. Hit it twice sharply with a hammer. Make sure that you hit it directly downwards and not on an angle.
 VIOLA!
Part 1 of your snap is complete! Your Donut and Outer Button are now married and on their honeymoon, trying to recover from that painful meeting with the hammer.

THE AFFAIR
Unbeknown to the Donut and the outer Button, their friends the Nipple and the Inner Button are having a secret affair.

THE COMMITMENT
Take your Inner Button and place it on the hard surface, then get your fabric ready.

A SECOND PIERCING
Again, use the thin end of your tool to push the fabric over the prongs of the Inner Button.

THE AMAZING BALANCING NIPPLE
With the Nipple facing towards you, balance it on the prongs of the Inner Button.

HAMMER & TOOL
Place the thick end of your tool onto the Nipple, and again hit straight down with the hammer twice.

VIOLA AGAIN!
The affair has turned serious. The Nipple and the Inner Button are now together for life!

THE LIVE HAPPILY EVER AFTER
You should now have two very sexy snaps placed in your fabric!


ONCE YOU'VE PRACTICED...
When it comes to inserting the snaps into your actual project, check that they are placed in the appropriate positions and in the right directions so that they will meet up. Then check again. Trust me, it sucks having to learn that your Nipple is trying to have an affair with your Outer Button and your pouch won't close!
I hope that's helpful. Any questions, drop me a line!
---
P.S. If the 'naughty passport covers' were so popular on Google, imagine the readers this Nipple post will bring in!

I've been doing a lot of that today. Why? Well, every five minutes or so, my lovely computer beeps and another sweet message pops up from a reader. In between the pop ups, I've been exploring the delicious talent hidden in the nooks of the crafty blogoshphere via the Sew, Mama, Sew! giveaway list. Have you seen some of the goodies up for grabs? IN-credible. Which reminds me- there's still time to enter my giveaway if you haven't already!
Now, onto the serious business: let's talk about Nipples and Donuts. The metal kind. The kind that can turn any little pouch into a serious wallet. This kind:
 After posting about the launch of my Snap Pouches, I received a few enquiries about how I put my metal snaps in. I'm here to serve, so here's your tutorial!
BEFORE YOU START
Grab a hammer, some scrap fabric and a pack of Metal Snaps from your local craft store. You'll want to practice the first few times in case things go wrong!
MEET THE TEAM
In every packet of snaps come four uniquely shaped pieces and a tool. The pieces are, from left to right, the Donut, the Inner Button, the Nipple, and the Outer Button. Take one of each pieces and the tool out so you're ready to go.

COME TO THE ENGAGEMENT PARTY
The Outer Button and the Donut are, in fact, engaged to be married.

OUT ON THE CONCRETE
These two belong together, so take them out of the pack and place the Outer Button on a hard surface. Yes, hard. Not an ironing board or a table. I'm talking a concrete porch with a single sheet laid down to protect your snap. Then get your fabric ready.

PIERCE WITH PRONGS
Take your tool and use the thin end to push the fabric over the prongs of the Outer Button.

THE JAGGED SEAL
The Donut has two different sides. If you look closely at the middle section of the Donut in the photo on the left, it has a sealed edge and a larger hole. The middle of the Donut in the photo on the right is far more jagged, as though it has little lines cut into it, and has a smaller hole.


GIVE THE DONUT A HOME
Place the Donut on the prongs of the Outer Button with the jagged side (small hole) facing towards you.

TOOL & HAMMER
Place the thick end of the tool flat onto the Donut. Hit it twice sharply with a hammer. Make sure that you hit it directly downwards and not on an angle.
 VIOLA!
Part 1 of your snap is complete! Your Donut and Outer Button are now married and on their honeymoon, trying to recover from that painful meeting with the hammer.

THE AFFAIR
Unbeknown to the Donut and the outer Button, their friends the Nipple and the Inner Button are having a secret affair.

THE COMMITMENT
Take your Inner Button and place it on the hard surface, then get your fabric ready.

A SECOND PIERCING
Again, use the thin end of your tool to push the fabric over the prongs of the Inner Button.

THE AMAZING BALANCING NIPPLE
With the Nipple facing towards you, balance it on the prongs of the Inner Button.

HAMMER & TOOL
Place the thick end of your tool onto the Nipple, and again hit straight down with the hammer twice.

VIOLA AGAIN!
The affair has turned serious. The Nipple and the Inner Button are now together for life!

THE LIVE HAPPILY EVER AFTER
You should now have two very sexy snaps placed in your fabric!


ONCE YOU'VE PRACTICED...
When it comes to inserting the snaps into your actual project, check that they are placed in the appropriate positions and in the right directions so that they will meet up. Then check again. Trust me, it sucks having to learn that your Nipple is trying to have an affair with your Outer Button and your pouch won't close!
I hope that's helpful. Any questions, drop me a line!
---
P.S. If the 'naughty passport covers' were so popular on Google, imagine the readers this Nipple post will bring in!


.jpg)


.JPG)


