Would you believe it? I still have the Thornbury Market flu. Sixteen days and counting! I've made promises to my Pepperberrians, though, so I've momentarily escaped from bed to post this in-demand tutorial.
 Even with all my goodies looking so darn sexy, one of the main questions I have been receiving online and at markets is 'where did you get those labels from?'. My response? I didn't! I whipped them up myself in about 30 minutes, and you can too. Of course, if you're not that inspired by design or computers, simply contact me with what you'd like (littlemisspepperberry at gmail dot com) and I can make some for you.
Here's how to make your own, in only 6 steps!
Before you start, pick up a packet of Iron-On Transfer Sheets for White T-Shirts- they're usually A4 in size and have about 5 sheets per packet. They should be readily available at all craft and department stores.
Now, not everyone has Photoshop, or InDesign, or any other spiffy program- but most people have Microsoft Word, so I'm going to show you how to put your labels together in that.
1. CREATE YOUR LABEL ELEMENTS
In a new document in Word, create WordArt for the different elements of your label. If you know how to do this, skip ahead to Step 2. If not, here's the nitty-gritty:
2. MERGE YOUR LABEL ELEMENTS
Next, you need to merge all of the elements in your label. To do this, click on one WordArt/Picture element. Push down the Ctrl button, and wave your cursor over another element. The cursor should change to a little arrow with a plus sign next to it. When it does, click on the next element. Do the same for any remaining parts of your label.
While you have all of the text/pictures selected, right-click with your mouse or go to the WordArt Toolbar. In both places there is a heading called Grouping. Select this, and then choose Group. This will group all of your elements together so that they are one image; if you ever need to edit any of the single elements again, simply go back to Grouping and select Ungroup.
3. FLIP YOUR LABEL
Now you need to turn your image backwards, so that when you iron it on it faces the right way. Do this by clicking on your label image. In Word 2007, this will bring up the Image Toolbar, and you'll see an option to the right called Rotate. Select this and then choose Flip Horizontal. In earlier versions of Word, the options are similar- either click Draw and then Rotate or Flip and then Flip Horizontal.
5. MULTIPLY YOUR LABEL
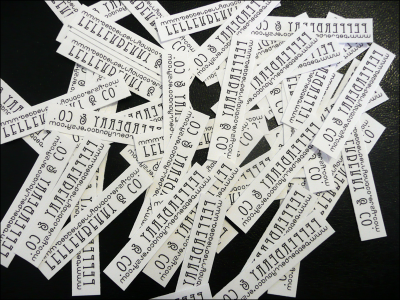
You're nearly done! All you need to do now is multiply your image. Place it in the top left-hand corner of the page, and whilst it’s selected, click Ctrl + C. This will copy the image. Then click Ctrl + V to paste the copy. Move the new copy next to the original image, remembering to leave a gap so that you can cut them; then, continue copying and pasting until your page is full of labels.
6. PRINT AND IRON
Finally, print the images onto the Transfer Sheets, making sure to follow the instructions on the packet regarding which print setting to use. Then, grab your handy paper slicer, chop them up, and iron on!
Viola! Sexy labels for all.
---

 Even with all my goodies looking so darn sexy, one of the main questions I have been receiving online and at markets is 'where did you get those labels from?'. My response? I didn't! I whipped them up myself in about 30 minutes, and you can too. Of course, if you're not that inspired by design or computers, simply contact me with what you'd like (littlemisspepperberry at gmail dot com) and I can make some for you.
Here's how to make your own, in only 6 steps!
Before you start, pick up a packet of Iron-On Transfer Sheets for White T-Shirts- they're usually A4 in size and have about 5 sheets per packet. They should be readily available at all craft and department stores.
Now, not everyone has Photoshop, or InDesign, or any other spiffy program- but most people have Microsoft Word, so I'm going to show you how to put your labels together in that.
1. CREATE YOUR LABEL ELEMENTS
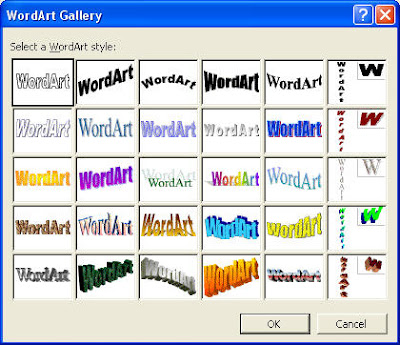
In a new document in Word, create WordArt for the different elements of your label. If you know how to do this, skip ahead to Step 2. If not, here's the nitty-gritty:
- In Office 2007, select the WordArt button on the Insert tab. In earlier versions of Word, click the View menu, then Toolbars, then select the Drawing toolbar. On the Drawing toolbar, click the Insert WordArt button.
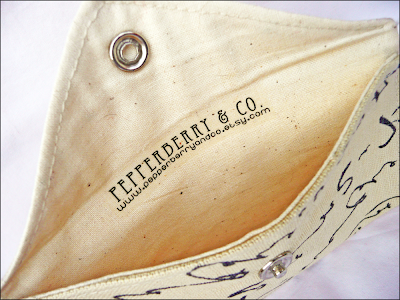
- Type the first line of what you want on your label- in my case, it was Pepperberry & Co. Select a font that inspires you, and make the size 36. Select Ok when you’re done, then repeat steps 2 & 3 for any other lines of text you want in your label. In my case, I added my shop address: www.pepperberryandco.etsy.com. I chose a different font for this so it stood out. You can also add a picture to your label at this stage.
 - Now comes the fun part! Word lets you be phenomenally creative if you know how to use it well. When you click on your WordArt, have a look at the Toolbar- a whole heap of options come up, including the ability to change the colour, size, shape and depth of your text. Have a play around until you fall in love with your creation!
- Once you’re happy with your text, arrange it in the shape that you want your labels to be. I wanted mine to be long and slim, so I put my text elements on top of one another.
2. MERGE YOUR LABEL ELEMENTS
Next, you need to merge all of the elements in your label. To do this, click on one WordArt/Picture element. Push down the Ctrl button, and wave your cursor over another element. The cursor should change to a little arrow with a plus sign next to it. When it does, click on the next element. Do the same for any remaining parts of your label.
While you have all of the text/pictures selected, right-click with your mouse or go to the WordArt Toolbar. In both places there is a heading called Grouping. Select this, and then choose Group. This will group all of your elements together so that they are one image; if you ever need to edit any of the single elements again, simply go back to Grouping and select Ungroup.
3. FLIP YOUR LABEL
Now you need to turn your image backwards, so that when you iron it on it faces
 the right way. Do this by clicking on your label image. In Word 2007, this will bring up the Image Toolbar, and you'll see an option to the right called Rotate. Select this and then choose Flip Horizontal. In earlier versions of Word, the options are similar- either click Draw and then Rotate or Flip and then Flip Horizontal.
5. MULTIPLY YOUR LABEL
You're nearly done! All you need to do now is multiply your image. Place it in the top left-hand corner of the page, and whilst it’s selected, click Ctrl + C. This will copy the image. Then click Ctrl + V to paste the copy. Move the new copy next to the original image, remembering to leave a gap so that you can cut them; then, continue copying and pasting until your page is full of labels.
6. PRINT AND IRON
Finally, print the images onto the Transfer Sheets, making sure to follow the instructions on the packet regarding which print setting to use. Then, grab your handy paper slicer, chop them up, and iron on!

Viola! Sexy labels for all.
---


.jpg)


.JPG)


Comments (50)
Thanks Sandra..I'm definitely one of those so computer illiterate, that I did start a blog, but gave up after the 1st entry as I didn't know what to. Computer jargon is a lost language to me I'm afraid. However, I'll definitely bookmark this. Your explanations looks really easy!
Thanks, 9Crafty11! Welcome to the blog :-)
Hi Sandra!
Awwwww thanks SO much sweetie for that easy-to-follow tutorial! :-) MUCH APPRECIATED! xx
Hope you feel better soon!
hugs,
Vikki x
Was wondering about your sexy labels! Now I can make my own (if I ever get a chance). Will be handy to put a label in the back of homemade clothes so the sprogs know which way around to put them on! Love your stuff - and hope you're feeling better soon.
I got eaten alive by the mozzies in FNQ so am waiting out the 4 weeks for the onset of dengue fever, LOL.
Ange.
So simple! As soon as I read 'iron-on transfer sheets' I understood how you'd made them. Inspired!
What a lovely tutorial! Thank you so much for sharing...you are such a guru:)
<3 sarasophia
oh what a great idea! thanks for sharing!
PS get better soon! 16 days is TOO long to be sick : (
I never even considered iron-on fusible. What a great idea for adding that personal touch. Thanks for sharing.
Thanks Sandra. What a great tutorial. I can already think of something I can use them on! Melinda.
What a great idea! Thanks for the tutorial..love the font!
Oh thanks so much for sharing. I might give them a try! I hope you feel better soon!
Thank you so much for the tutorial Sandra - I've been pondering labels for a while so now I can have a go when I get home from hols. Hurrah!
Hope you feel better soon old bean xx
Sandra - you're brilliant. Thank you for posting the tutorial - I'm going to hunt for those sheets in Bendigo on Thursday. So sorry to hear you are still ill with the flu - I'm sending healing thoughts your way. Take care of yourself.
Hey, nice one. Thanks. Now get back to bed and demand TLC before you are wrongly declared well enough to be up!
Great job Sandra, I have never labelled anything - I am too slack but it does make things look so professional...
That is awesome Sandra. I've been wondering what to do about labels and this is perfect! Thanks for sharing.
Just brilliant! Hope you get rid of the dreaded flu soon :)
what a fab tutorial thank you soo much I too had admired your gorgeous labels!! thanks too for your thoughts on PIF and I do hope you are better soon 16 days is a bit much!!!!
wow they look so professional, you clever thang!
They look fantastic!
Thanks for sharing your wisdom :)
Great tutorial... once again, I am suitably impressed!
I still have that bloody flu too!
I've seen tutorials on this before, but yours are THE BEST! I love the labels! I have a laser printer, I don't think I can do them :(. I'm looking into woven labels, but they're so expensive! Thanks again for the detailed tutorial...you rock! Get better!!!! xxoo
Wow that is such a great idea! I'm putting this in my favorites folder. Thank you =)
Terrible to hear you're still fighting off that nasty bug! Hope you're on the improve soon.
Love the tutorial. Thanks for showing us such an easy way to make our pretty things look more professional...just like yours. Also wanted to let you know that I picked my gorgeous little apple, snap pouch up from the post office today. It's the perfect size for my iPhone.
Thanks again!
Kylie xx
Thanks for the tutorial! This sounds do-able and there are lots of possibilities!
awesome tutorial! i will try this out soon! Thanks,
Robin
They look fabulous. Thanks for the clear easy to follow instructions. Now I'm going to continue browsing your lovely blog.
Labels are so fun. Maybe someday my life will be somewhere where I'll actually need labels!
Oh hey thanks for that. its really good of you to take the time, and when you are still feeling blurgh!! Hope you perk up soon. : )
Ok -- this is one of those smack your forehead and yell "Why didn't I think of that" moments. Fabulous -- thanks for posting!!! (And hope you're feeling better soon!
Sandra
thanks for sharing this. It looks so professional. And I now love Warrendyte too. beautiful
Very nice...they look very professional!
thanks for that tut, so easy to understand for us computer illiterate. I love your labels!
Thanks Sandra, I needed some labels and liked yours, have oprinted and cut, now trying to iron. Will pop by and say in yarraville, bec.
Thanks for the great tutorial.
I made some labels for myself and have blogged about it here:
http://patchandi.blogspot.com/2009/05/tutorials-in-wonderland.html
with a link to this post.
Andi :-)
Thanks so much for doing this tutorial!!
Wow! thanks for this! I will be using this info for future projects. I linked to it at somedaycrafts.blogspot.com
Thanks for the idea... I was wondering if these transfers will "smear" if they're ironed afterwards (in case you use them in clothing)?
I will try it for sure!!
Am I glad that I didn't already ordered some labels! I was looking for a shop that sold custom labels just yesterday! Thank you and thanks to oneprettything.com!
This is awesome - thanks so much for sharing. I'm having one of those throw the computer out the window moments though ... unfortuntely I cannot seem to get my items to group. arg. I always manage to make something easy difficult ;-) I'll get there!
Just wanted to let u know I tried yr tutorial with success and blogged about it on monday
sharon
I thoroughly enjoyed your post about the labels but am stuck at trying to merge the two WordArt elements together. There must be something totally magical about waving the cursor over the element! I get the plus sign, but then I add another element like the one I've already selected. ARGH!!!! Any help you can offer would be appreciated, as I just adore these labels! Thanks for a great blog!
Judy
I love this! I used your tute to make garment tags:
http://lilblueboo.blogspot.com/2009/09/halloween-batik-toddler-top.html
Thank you so much !!
I've been looking to purchase some labels on ebay for $30 for my clothing..
But NOW I can make my own alot cheaper !!
Great tutorial, thanks for doing it. What font is that, and which word art style did you choose? I'm not sure I understand putting text elements on top of each other though.
Hi Sandra,
Did you use a clear transfer in the example above?
As it does this, it destroys the footling shoes and Robeez fifty-fifty offer
footwear for your minor which is the closest you volition get to Interior decorator personalized labels
place.
Look into my web blog bumper Stickers
I think the admin of this web page is really working hard in support of his web page, as here every information is quality based stuff.
Feel free to visit my blog post: acid rain dvd
Thank you so much! This helped me so much! I am now heading to the store to pick up more ink. I am so excited to see how these turn out!!!